
You’ll need your BotShield Console API key (from console.botshield.ai → Settings → API Keys). Keep it handy for step 3.
1. Install the package
Install BotShield from AgentExchange into your org (production or sandbox). After install, open the App Launcher and choose BotShield — you’ll land on the Home tab with a health pill reading0/8 ready until setup is complete.
2. Assign permission sets
Assign the permission sets to the users who need them (Setup → Permission Sets, or the People section of the BotShield Setup tab):3. Connect your Console keys
BotShield calls your BotShield Console over Named Credentials — no keys are stored in code or metadata.1
Set the agent key
Go to Setup → Named Credentials → External Credentials →
BotShield_Agent_Default, edit the principal, and paste your Console agent key into the credential parameter. This authorizes the Agents Ask rail.2
Set the Admin API key (optional)
On the
BotShield_Admin_API External Credential, paste a read-only Admin API key. This lets the app sync your deployments and agents automatically. Without it, everything still works — you just add deployments manually.3
Choose your environment
In the BotShield Setup tab, set the environment to Production (or Staging while you test). This points the widgets and callouts at the matching BotShield hosts.
4. Connect the Console and choose what pushes
This is where you tell BotShield to write verifications and resolutions back into your org. In the Console, open Settings → Integrations — the list of platforms that receive BotShield Gate results and Agents Ask resolutions — and find the Salesforce card. It’s two steps: connect, then configure targets.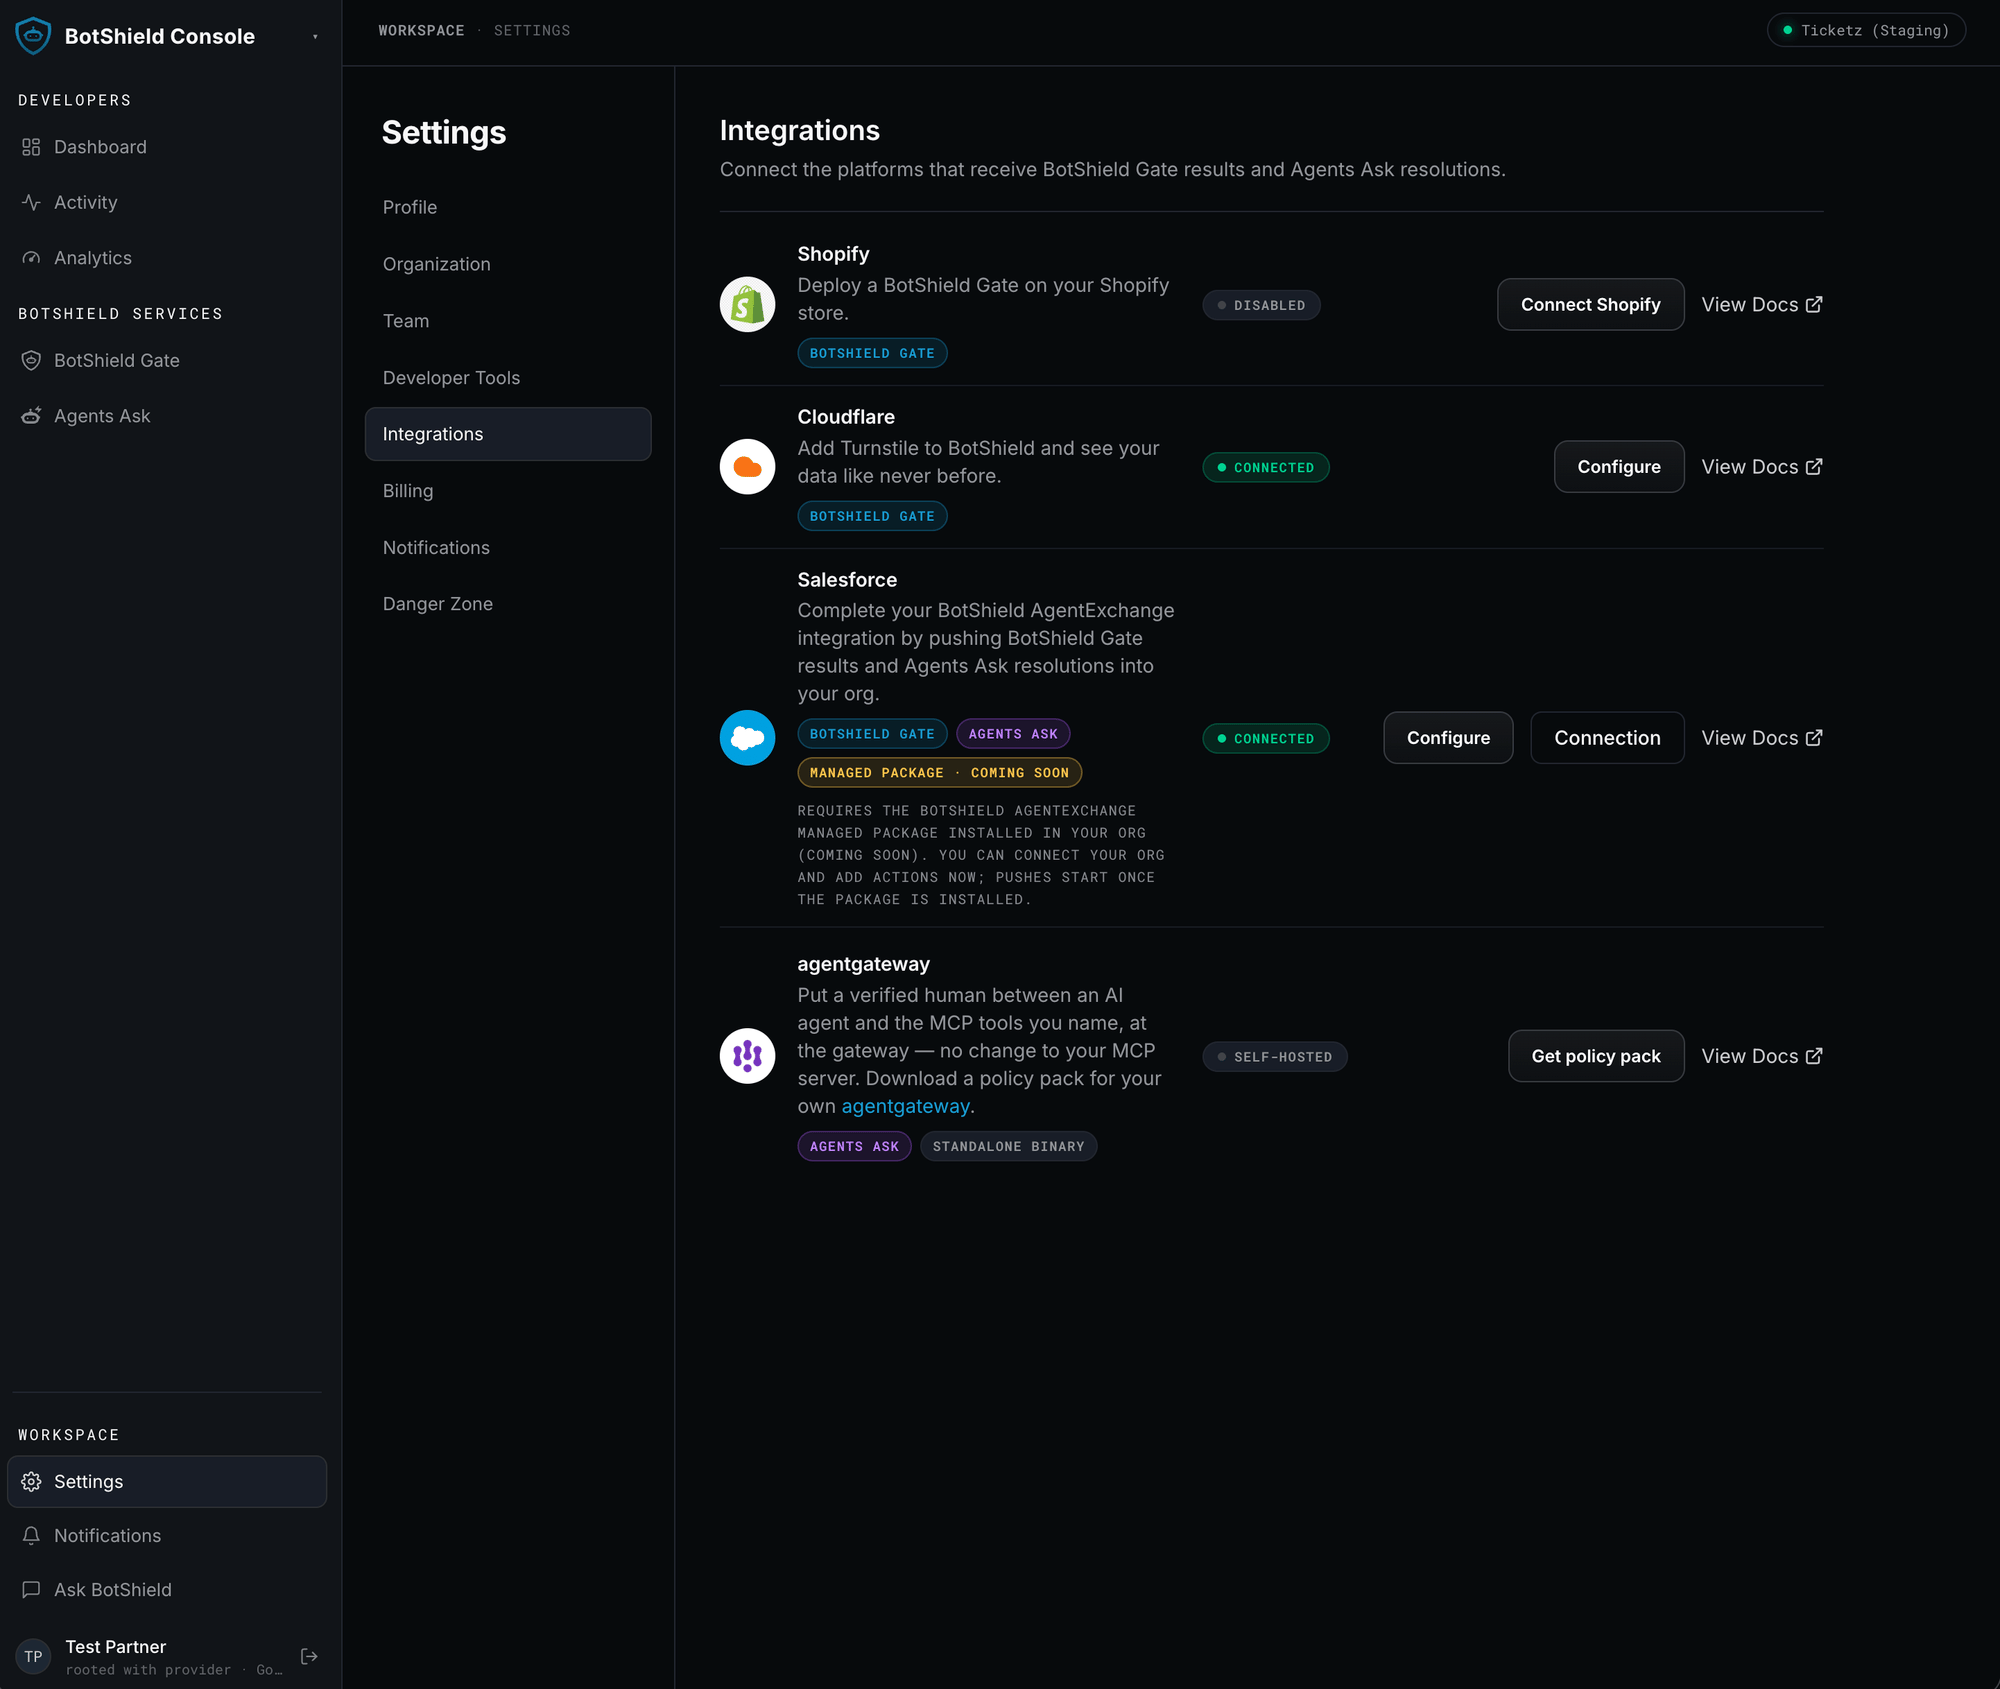
Settings → Integrations — the platforms that receive BotShield Gate results and Agents Ask resolutions.
4a. Connect your org
Click Connection on the Salesforce card. BotShield authenticates to your org with Connected App credentials (OAuth client-credentials flow) — one org per environment.1
Pick the environment
Choose the Development or Production tab. Development receives your sandbox / Developer Edition events; Production, your production org.
2
Enter the Connected App credentials
Paste your org’s Instance URL, Consumer Key, and Consumer Secret — from the Connected App (External Client App) in your Salesforce org. The BotShield Setup tab’s Data push section walks you through creating it: OAuth enabled,
api scope, client-credentials flow, Run-As an integration user holding the BotShield_Integration permission set. Secrets are stored server-side and never shown again.3
Test and save
Click Test Connection. A green result means the Console can reach your org through the Run-As user. Save, then flip Enable Salesforce Integration on.
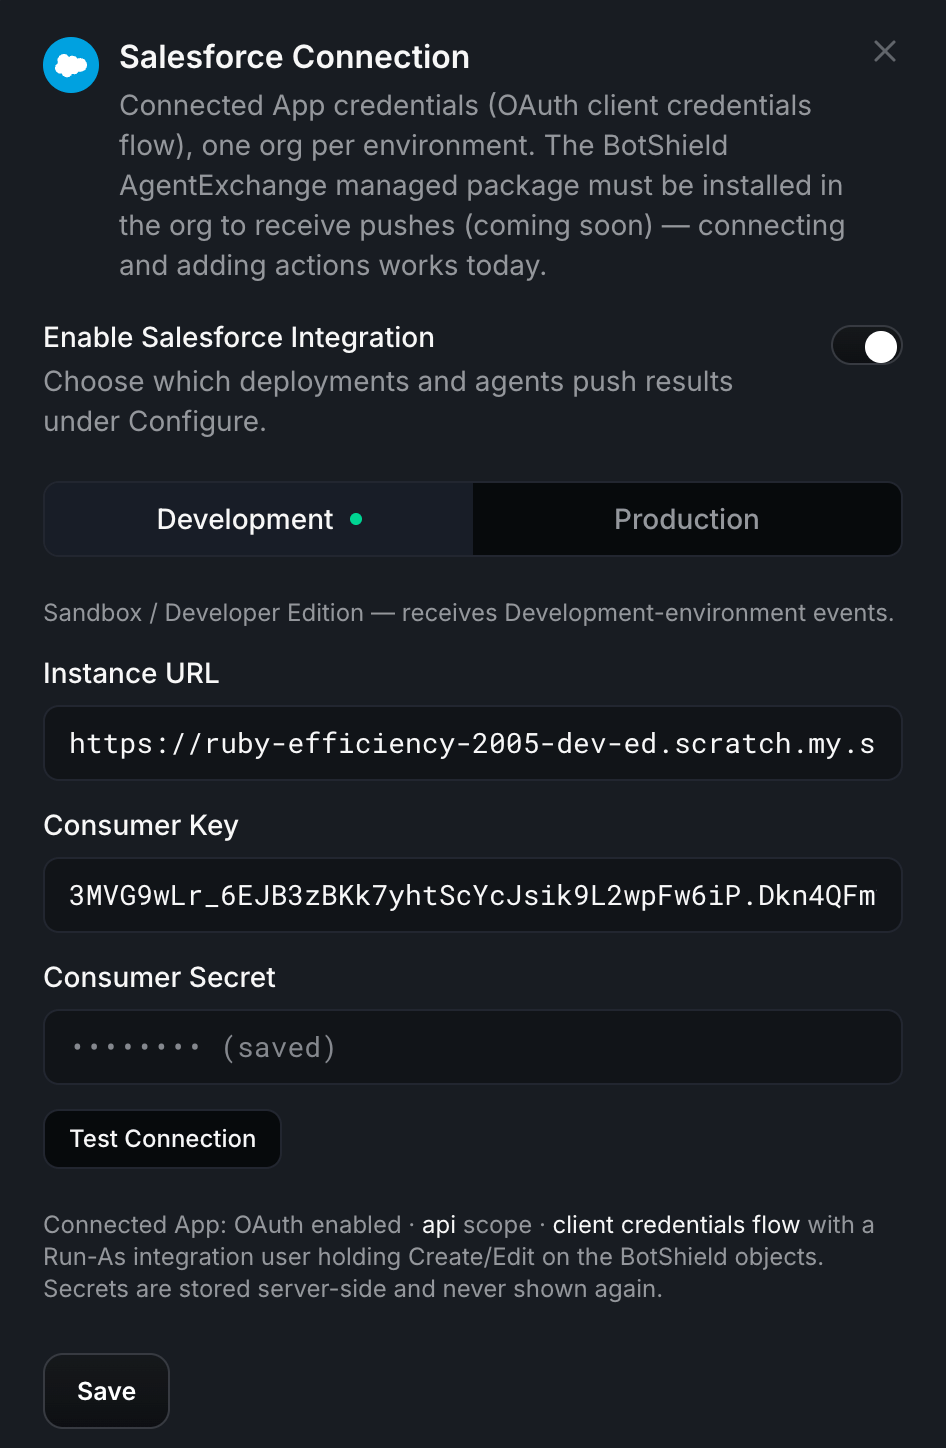
Salesforce Connection — Connected App credentials (OAuth client-credentials), per environment.
4b. Choose which Gates and Agents push
Back on the Salesforce card, click Configure. You’ll see a two-column picker — Available on the left, Pushing to Salesforce on the right — with the same Development / Production toggle. Move the deployments and agents you want writing into your org to the right-hand column:- BotShield Gates write verification outcomes to
BotShield_Gate__c. - Agents Ask agents write approval outcomes to
BotShield_Resolution__c.
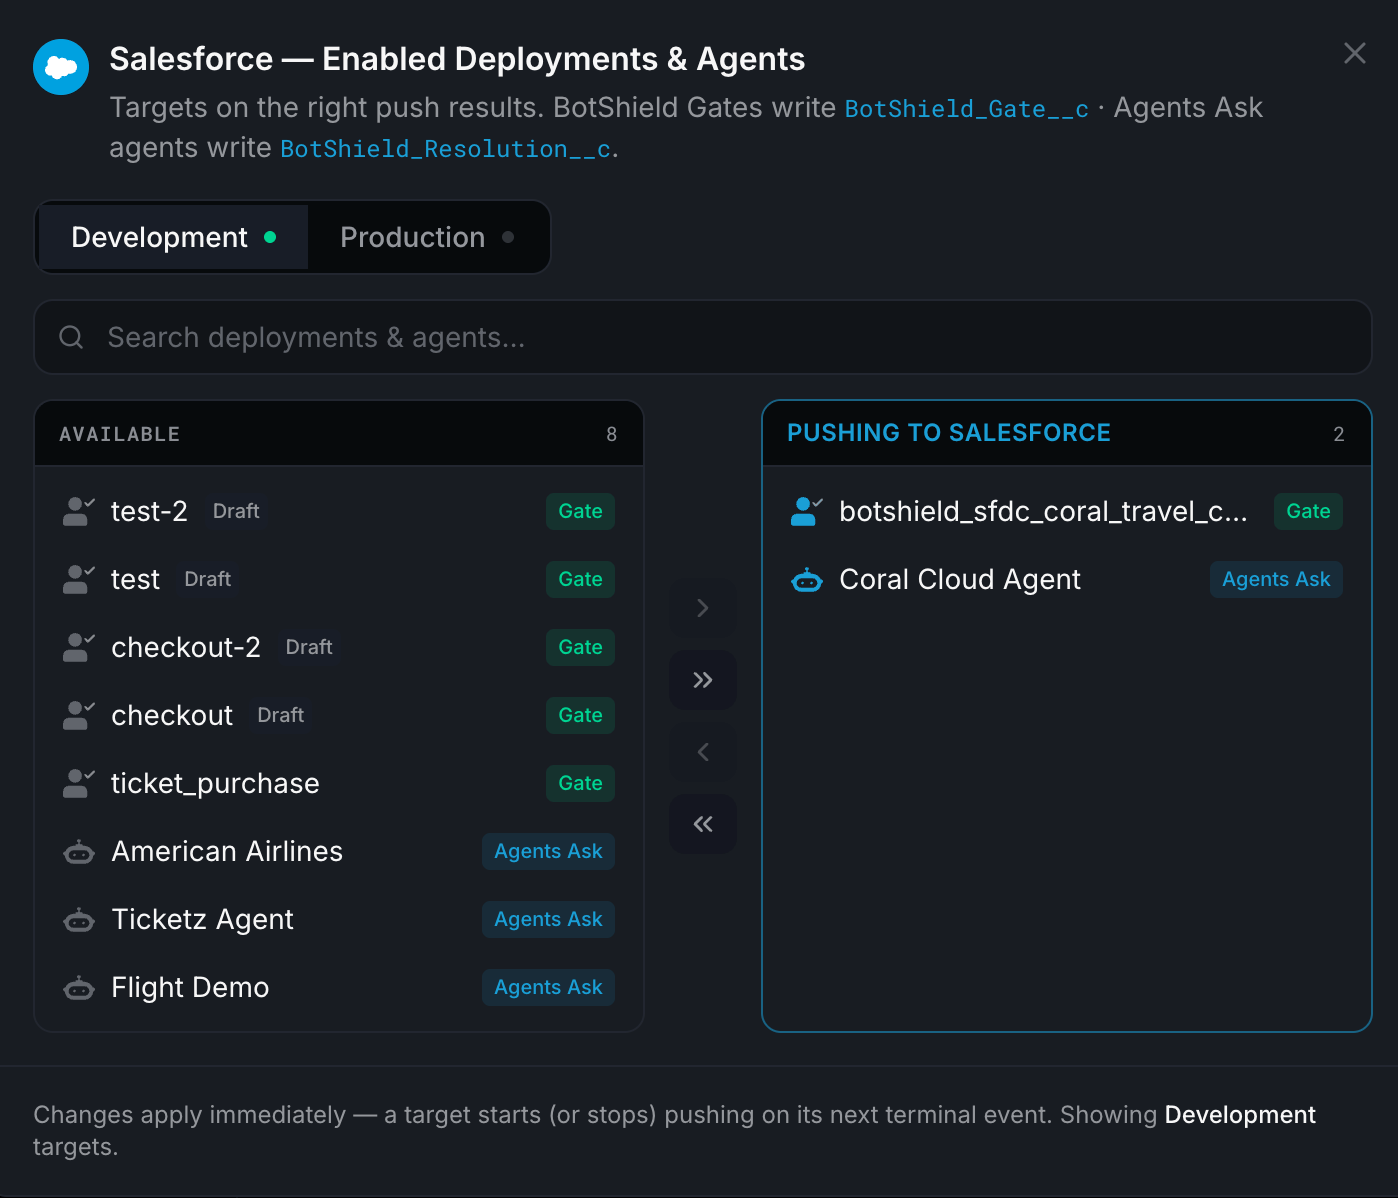
Configure — move Gates and Agents into “Pushing to Salesforce.”
The managed-package push requires the BotShield AgentExchange package installed in the org. You can connect and pick targets now; pushes start once the package is installed.
5. Verify
Open BotShield → Setup and click Re-check. Each row turns green as its prerequisite is met — keys set, run-as user assigned, last row received. When the health pill reads all-ready, you’re set.Next steps
Human Verification on Experience Cloud
Gate an Experience Cloud checkout or form.
Agents Ask in Agentforce
Require human confirmation for agent actions.
Agents Ask in Flow
Pause a Flow for a human approval.
Link with BotShield
Pair the BotShield app so people can be asked.